Drone technology has come a long way in a short space of time. But despite all the clever algorithms and pioneering safety features, there’s still so much more to capturing great photos than just taking off and pushing a button.
Just like professional photography on the ground, setup is everything. You have to plan, take stock of the conditions and build a composition - all while taking advantage of the benefits that come with using a drone.
Here are a few steps to help you capture the most professional drone photography images.
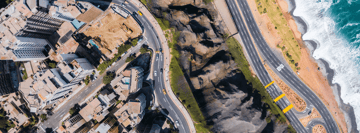
Use the height to your advantage
The obvious upside to using a drone to capture photographs is the ability to get above the action. Flying high above a scene allows you to capture it from a range of original and creative perspectives.
It goes without saying that working out the right altitude is important. Too much height and you risk losing the interesting details and any sense of subject in your shot.
Too little height and you're not developing the context of your composition or making the most of the drone’s best feature. Experiment with different altitudes and appreciate that higher is definitely not always better. Be flexible on the day and see what works best with the subject you have in mind.
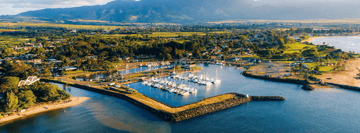
Make the most of panoramic tools
Most drones on the market today come with clever software that enables one-touch panoramas. The drone will hover in place, slowly spin 360 degrees and capture high definition images as it turns, before stitching them together for you.
Full panoramas are great, but the tool is also useful if you just want to capture more width than the frame usually allows.
You can take a full pano and cut it down to the best parts in post-production. Save your images as RAW files so you can quickly edit and restitch them depending on which part of the scene you want to focus on. These ultra wide-angle shots are ideal for capturing landscapes.
Account for the weather conditions
As with any type of photography, the quality of your shots will largely be dictated by the light and weather conditions.
Accounting for the conditions is a process that should have an impact on the day you fly, the time of day you fly and the flight path and angles you choose once you’re up in the air.
Clear days with blue skies and low winds are preferred by drone pilots for obvious reasons. These allow you to capture photos that are well lit and nicely saturated with color. But overly bright scenes can be a challenge. If you’re shooting a landscape with snow or sand on a sunny day the threat of overexposure is constant. Consider adding some neutral density filters to your gear, which will allow you to adjust the aperture and shutter speed without overexposing your photos.
It’s also worth taking the time to think about how the sun’s position will impact your composition. Use an application like Sun Surveyor or Photopills to work out where the shadows will be and when.
Sometimes poor conditions can actually work in your favor. Fog and mist look incredible from above, for example - providing you can actually get above them. Even dark clouds give you the opportunity to experiment and bring a sense of mood to your images.
Tweak your camera settings
Even the smallest manual changes to your drone’s camera settings can make a huge difference to your final photographs, so you should always tweak them according to the conditions.
When adjusting the exposure options of ISO, shutter speed and aperture, many professional photographers choose to use the base ISO to get the best possible image quality. This usually stands at 100. If you go too much higher, you’ll risk drone shots with more noise and less clarity. But that’s not always feasible in certain light conditions, so it’s important to get comfortable adjusting your aperture and shutter speed to suit what’s in front of you.
These settings will always depend on the light available, the subject and the type of shot you are trying to achieve.
When shooting videos, you should manually set your camera’s exposure and white balance to prevent them from shifting around to compensate for changing light and color as you move. The same goes for aerial photographs, but you can make those changes once you’re up in the air and have settled on a subject and an angle to capture it from.
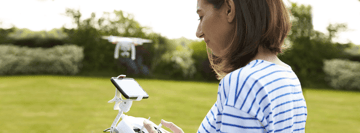
Use your Histogram and Overexposure Warning
One of the challenges most drone pilots face is trying to gauge the composition of a shot through the screen of a smartphone or tablet.
It can be difficult to properly read your exposure until after you’ve packed up and it’s too late to go and capture the shot again - particularly on bright sunny days.
DJI Go comes with a couple of useful tools to stop this from happening. First up is the histogram, which provides a visual representation of your exposure. Second is a simple overexposure warning, which highlights areas of overexposure with a zebra pattern on your screen.
Turn on both of these options and adjust your settings if either indicates that the photos you are about to take will be too dark or too bright.
Now that summer’s in full swing, take a look through our top apps and accessories to make the most of your drone while the sun is shining.